Reviving an engine that has been inactive for months or years
Piston aircraft engines hate to sit unflown. During lengthy periods of disuse, the protective oil film strips off critical surfaces like cylinder walls, cam lobes and tappet faces, exposing them to risk of corrosion pitting. Then afterwards, when the engine is finally “dry started” with the oil film depleted, these critical surfaces can be subject to abnormal friction and wear until oil flow is restored and these splash-lubricated surfaces get coated with oil once again. The engine suffers as a result.
Unfortunately, this sort of thing happens a lot. My own Cessna 310 was grounded on November 1st when its annual expired. My planning was to complete the annual in December, but I wound up catching a nasty virus that had me confined to quarters for a couple of weeks. Now it’s looking like the plane won’t be ready to fly again until late January. My engines are not happy about this.
Recently I was contacted by a pilot who acquired a 1968 Shrike Commander that had been sitting unflown in a hangar in Oregon for the past 14 years. The new owner asked me for suggestions on how to revive this aircraft and how to determine whether it’s still airworthy. He was appropriately concerned about the possibility of internal engine corrosion damage.
Another pilot based in northern New Hampshire told me that his Maule M5 had been stuck on the ground for four months due to severe winter weather. He was looking for guidance about the best way to start its Franklin 220-C engine in the spring and minimize damage.
A homebuilder had purchased an experimental Lycoming engine for his Van’s RV, but completion of the airframe had taken longer than expected so the engine sat in its crate for the better part of a year until the plane was ready to accommodate it. He asked for advice on what precautions to take before the first engine start.
Pre-lube
The key to avoiding damage on the first engine start after a long period of disuse is pre-lubrication. Our engines aren’t designed to make this particularly easy, but some precautionary steps can help minimize the excessive friction and wear of a “dry start.” Here’s what I recommend doing before that critical first start:
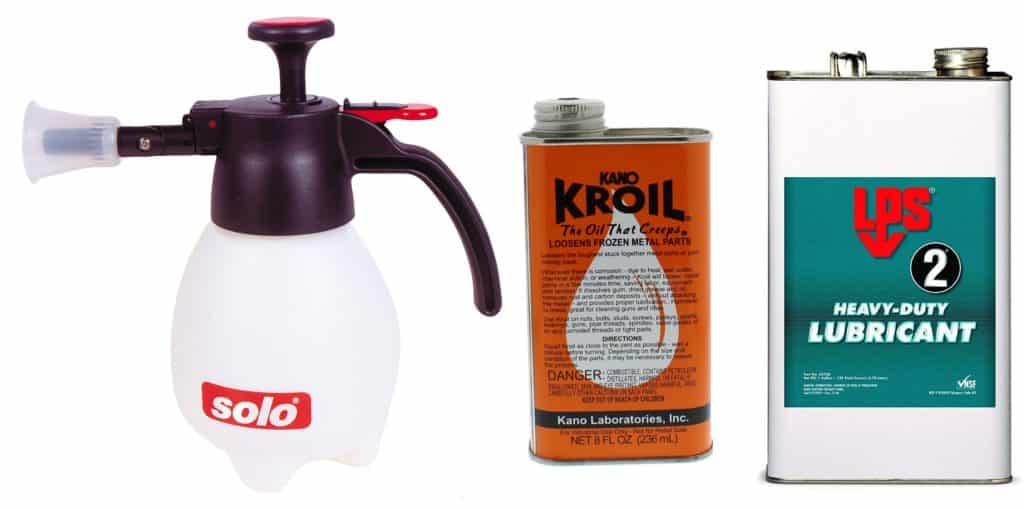
After uncowling the engine to gain access, remove both the top and bottom spark plugs from each cylinder. Rotate the prop by hand to position a piston at bottom dead center, and then fog the combustion chamber with light aerosol oil through both spark plug holes. My favorite method for doing this is to use an inexpensive handheld pump-up sprayer (e.g., the Solo 418 as pictured) filled with Kroil or LPS-2 penetrating oil. Adjust the sprayer nozzle to produce a very fine mist—preferably a fog—that will drift through the combustion chamber and coat all exposed surfaces. Repeat this procedure with each cylinder in turn until you’ve thoroughly pre-lubed them all.

It’s also not a bad idea to pre-lube the crankcase by fogging it with oil mist through the crankcase breather. The idea is to get at least a thin film of lubricant on the cam lobes and tappet faces. To accomplish this, use the highest pressure and finest spray nozzle setting your spray bottle allows in order to generate the finest oil mist possible.
The next step is to “motor” the engine using the starter until oil pressure registers on the cockpit gauge. Make sure the spark plugs are still removed from the cylinders and that the propeller arc is clear of obstructions. Using the cockpit start switch, crank the engine for a maximum of 30 seconds, watching the oil pressure gauge for the first indication of oil pressure. If that doesn’t occur within 30 seconds (and it probably won’t), let the starter motor cool for a minute or so and then crank the engine for another 30 seconds. Continue this crank-and-cooldown procedure until you see an oil pressure indication.
This completes the pre-lube procedure. You’ve fogged the cylinders and crankcase with oil, primed the oil pump, filled the oil galleries, and pre-lubed the main and rod bearings. If it’s a Continental engine with its low-mounted camshaft, you’ve probably dripped some engine oil on the cam lobes and tappet faces (something that’s not possible for a Lycoming with its high-mounted camshaft). The engine is as ready for that critical first start as we can make it (short of disassembly).
First start
Eyeball the spark plugs that you removed. If they’re dirty, clean them. If the gaps look excessive (more than 0.21 inches for most aircraft-style plugs), use an aircraft spark plug gapping tool and wire-type thickness gauge to tighten them up (0.16 inches is usually about right). Reinstall the plugs in the cylinders using conductive anti-seize compound and a new copper gasket, and torque to spec. Connect the ignition harness and cowl-up the engine. Now you’re ready for the big moment.
Everything I’ve described so far are preventive maintenance tasks that an aircraft owner may do legally on his own recognizance without involving an A&P mechanic. Of course, if you’re more comfortable having an A&P help you with this, by all means do.
The first engine start after a long period of inactivity needs to be done with caution. If the engine is hard to start, make sure you never crank it for more than 30 seconds without giving the starter motor a cooldown. It’s surprisingly easy to burn up a starter motor by excessive cranking—they’re lightweight and not designed to withstand continuous operation.
Prime the engine sparingly. Excessive priming can wash off that precious lubricant we spent so much time and effort fogging into the cylinders. Flooding the engine is the last thing you want to do. If the engine won’t fire after a reasonable amount of priming and cranking, there’s probably something amiss with the ignition system and you’ll need to stop cranking and start investigating.
Once the engine fires, resist the urge to “rev it up.” You need to let the engine idle at minimum RPM (typically 600-800) for at least a minute or two until the engine warms up a bit and all the splash-lubricated components (especially the cam lobes and tappet faces) have had a chance to get thoroughly drenched with engine oil. Then you can throttle up to higher RPM but do so very slowly and cautiously. The stress on the cam-to-tappet interface rises very sharply with increasing engine speed, so premature throttle-up of a dry-started engine is a great way to damage those components and empty your wallet.
After the first start and with the engine nicely warmed up, you may feel ready for your first flight with your revived engine. For this, I recommend operating the engine as if you’d just replaced the cylinders: use the same “break-in” procedures that I described in the January 2019 issue of AOPA PILOT. Run it hard for at least an hour.
Inspection
You’ll notice that I haven’t mentioned doing a borescope inspection of the engine before first start. That’s intentional. Inspecting a long-sitting engine prior to first start won’t tell you much. If you borescope the cylinders, you’re almost certain to see light surface rust on the cylinder walls (assuming they’re steel and not chrome- or nickel-plated), but you won’t be able to tell the degree of corrosion pitting until that surface rust has been scraped off and the underlying surface made visible. If you can work the borescope into the crankcase to view some cam lobes—something that’s easier for some engines than for others—you’ll run into the same problem. That’s why I recommend doing a borescope inspection AFTER the engine has been run awhile.

Borescoping the cylinders after the first flight or two is a no-brainer. You can use a cheap rigid borescope like the ViVidia Ablescope VA-400 to inspect the cylinder walls for evidence of corrosion pitting, vertical scoring, and the presence or absence of visible crosshatch microfinish. Also inspect the exhaust valves for evidence of asymmetry indicative of leaking and burning.
Inspecting the cam and lifters with a borescope can range from easy to near-impossible depending on what engine you have. The easiest to inspect are Continental engines with sandcast-style crankcases—those with a front-mounted oil cooler and a rear-mounted belt-driven alternator. For those engines, it’s a cinch to insert a borescope into the crankcase through the oil filler port and work it past the crankshaft to view the frontmost three cam lobes and four lifters.
Continentals with Permold-style crankcases—with front-mounted gear-driven alternator and rear-mounted oil cooler—are a bit tougher to inspect. The easiest way is to remove the alternator and insert a borescope through the crankshaft ring gear to view the frontmost cam lobes and lifters. If you have a flexible borescope with a thin probe, it’s possible (though a bit tricky) to perform the inspection by removing the 7/8-inch timing plug from the left side of the crankcase nose (opposite the alternator) and do the same thing.

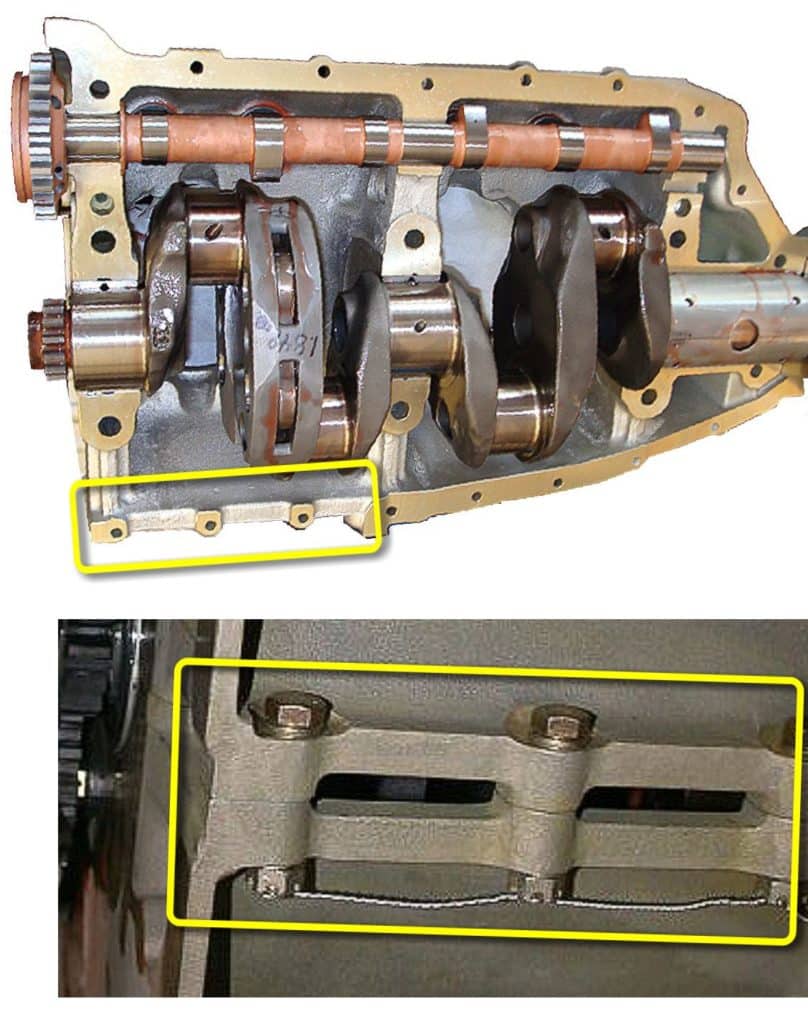
Lycomings are the toughest to inspect. Many say that it’s impossible to look at the cam or lifters without removing cylinders. That’s not quite true. If you drain the oil and use the oil drain port to insert a flexible borescope with a probe that’s no more than 5.5 millimeters in diameter (such as the ViVidea VA-350 pictured), it’s possible to work it up through the slots in the bottom rear of the crankcase and past the crankshaft to visualize the rearmost three cam lobes and four tappets located above the crank. It’s a bit tricky but it can be done.
Alternatively, you can just fly the engine, do frequent oil changes (e.g., every 25 hours), and cut open and carefully inspect the oil filter with a magnet for the presence of significant quantities of ferrous metal. Inspect any such metal found under magnification. Spalled tappets usually throw off small and irregularly shaped flakes, while spalled cam lobes usually produce fine metal whiskers. If you’re able to get through the first 100 hours without seeing significant ferrous metal in the oil filter, you can probably relax and conclude your resurrected engine dodged the bullet.
You bought a plane to fly it, not stress over maintenance.
At Savvy Aviation, we believe you shouldn’t have to navigate the complexities of aircraft maintenance alone. And you definitely shouldn’t be surprised when your shop’s invoice arrives.
Savvy Aviation isn’t a maintenance shop – we empower you with the knowledge and expert consultation you need to be in control of your own maintenance events – so your shop takes directives (not gives them). Whatever your maintenance needs, Savvy has a perfect plan for you: