The decision whether or not to tear down an aircraft engine is among the most difficult and agonizing ones we make.
My company manages the maintenance of many hundreds of piston-powered GA airplanes, so we frequently deal with all manner of engine problems. Our biggest challenge involves diagnosing the problems and then deciding what work needs to be done to get the problems resolved.
In making these decisions, we work hard to resolve problems in the most minimally invasive way possible. For example, we never let a mechanic pull a cylinder unless we’re absolutely convinced through non-invasive techniques—borescope inspection, engine monitor data analysis, spectrographic oil analysis, scanning electron microscopy of oil filter contents, etc.—that cylinder removal is genuinely warranted. We very seldom approve a so-called “top overhaul” (replacing all cylinders at once) since it is almost never the case that more than one or two cylinders actually need to be replaced.
By far the most agonizing decisions we have to make involve whether to remove an engine from the airplane and send it to an engine shop for a teardown. Tearing down an engine is the most invasive thing you can do to an engine. It’s expensive—typically $15,000 for a minimal teardown inspection and repair, if you include the removal and installation labor, and possibly $40,000 or more if it turns out that a full engine overhaul is warranted. It’s inconvenient—usually the airplane is grounded for 60 days or more. And it’s risky—NTSB data shows that the overwhelming majority of catastrophic in-flight engine-failure accidents occur during the first 200 hours or 24 months after the engine is built, rebuilt or overhauled.
For all these reasons, tearing down an engine is never something we do lightly. In this month’s column, I thought it might be instructive to illustrate how we make these decisions by discussing some actual case studies that we’ve faced during the past few months.
Prop Strike
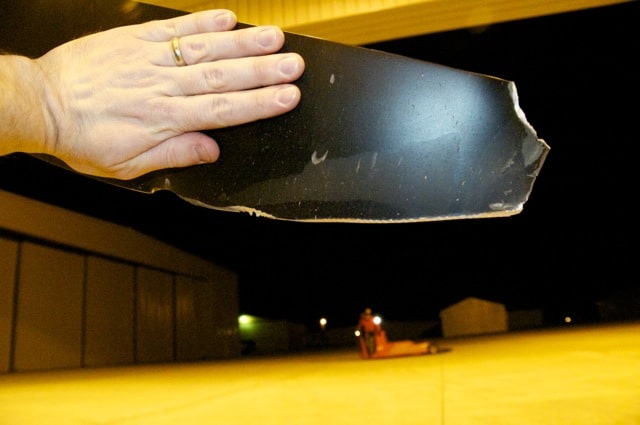
We deal with at least a half-dozen prop strikes a year. Most of these occur in singles, but last month we had a double prop strike in a Cessna 421B that we manage. The 421B pilot had a nose baggage door come unlocked on initial climbout into a 400-foot overcast, and made a correct decision to put the airplane down on the remaining runway. Unfortunately, he had started gear retraction before the baggage door flew open. Although the pilot selected gear-down shortly after he made the decision to reject the takeoff, the airplane touched down before the gear was down and locked, resulting in a double prop strike and some gear damage.

Doing an engine teardown after a prop strike is as close to a no-brainer as these things get. Both Continental and Lycoming are very clear that a teardown inspection is necessary after any event that results in propeller damage, and for Lycomings it’s actually required by regulation AD 2004-10-14, which defines a prop strike as:
(1) Any incident, whether or not the engine is operating, that requires repair to the propeller other than minor dressing of the blades.
(2) Any incident during engine operation in which the propeller impacts a solid object that causes a drop in revolutions per minute (RPM) and also requires structural repair of the propeller…
(3) A sudden RPM drop while impacting water, tall grass, or similar yielding medium, where propeller damage is not normally incurred.
Insurance always covers the cost of the engine teardown (including removal and installation) plus any necessary airframe and propeller repairs arising out of the prop strike. In fact, we’ve seen cases where an owner decided against doing a post-prop-strike teardown, only to find that his insurance company refused to renew his aircraft insurance when the underwriter considered the aircraft too risky to insure because of the possibility of undiscovered internal engine damage.
If the engine is near or past TBO when the prop strike occurs, savvy owners will often decide to convert the post-prop-strike teardown inspection into a full major overhaul. Although insurance won’t cover the full cost of the overhaul, it will provide a substantial subsidy, making the overhaul a significantly less costly event than it normally would be. It’s actually a windfall for the owner.
Pre-Ignition Event
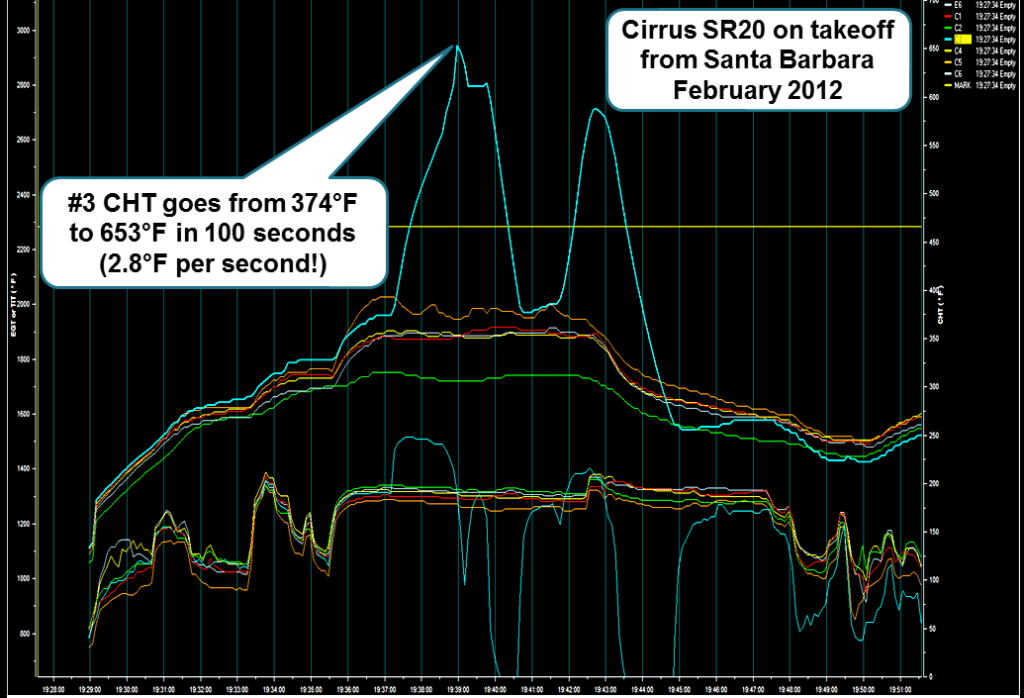
A couple of months ago, one of our Cirrus SR20 clients based in Southern California flew to Santa Barbara for the day on a Saturday. When the time came for him to fly home, he saw a high-CHT warning on his JPI digital engine monitor shortly after takeoff, coupled with some engine roughness that felt abnormal. The pilot wisely decided to reduce power and return to the departure airport. He dumped his JPI data and posted it to a trouble ticket on our system.

When I studied the engine monitor data (see Figure 2), I could hardly believe my eyes. During a period of just over a minute and a half, the #3 CHT rose from 374ºF (normal) to 653 ºF (almost 200ºF over red-line). The rate of temperature rise was 2.8ºF per second, the most rapid I’d ever seen in decades of looking at such data.
I knew that only one thing can cause this kind of extreme runaway CHT: a violent pre-ignition event. Such an event occurs when something in the combustion chamber heats up to the point that it starts to glow red-hot and act like a glow plug, igniting the fuel-air mixture prematurely (before the spark plug fires), creating extreme temperatures and pressure that can destroy the cylinder and piston in less than a minute. I’d seen many of these events in the past, but never one where the CHT rose so rapidly and reached such a high peak.
We got the airplane into a local shop at SBA first thing Monday morning. I asked the shop’s Director of Maintenance to perform a borescope inspection of cylinder #3, and explained to him that I believed that cylinder suffered a violent pre-ignition event that most likely would have melted the corners of the piston crown and damaged the spark plugs.
A few hours later, the DOM reported back his findings: (1) the gold paint on the #3 cylinder barrel was black and blistered; (2) the top spark plug was loose and had backed out nearly a full turn, stopped at that point only by the ability of the ignition lead to twist; (3) the bottom spark plug was just barely more than finger tight; (4) the spark plugs on the other five cylinders were seriously undertorqued, requiring between 1 and 1.5 “flats” to get them up to specified torque; (5) the piston crown was melted over about one-third of its circumference all the way down to the top compression ring groove; and (6) both #3 spark plugs were packed with aluminum (presumably from the melted piston).
Based on these findings, we believe that the probable cause of the pre-ignition event was failure of the shop that performed the last annual inspection on this aircraft to torque the spark plugs properly. When the top #3 plug started to back out, it lost its normal heat conduction path through the copper gasket to the cylinder head. Without its normal heat sink, the spark plug became so hot that some portion of it started to glow red-hot and triggered the violent pre-ignition event that followed.
At this point, it was obvious that the cylinder and piston would have to be replaced. We instructed the DOM not to even attempt to repair the cylinder, because with a CHT of 653ºF we believed that the metallurgy of the cylinder head had been so badly compromised that its only appropriate use would be as a lamp base. The piston was so badly damaged that it took the shop 4.5 hours of labor and some clever work with a hydraulic “jaws of life” tool to extract the piston pin and remove the piston from the connecting rod. Fortunately, the connecting rod bushing was still in good shape.
Having committed to replacing the cylinder and piston, our next challenge was to determine how much collateral damage the engine suffered. We had the shop pull the oil filter and cut it open, and not surprisingly they found a large quantity of aluminum in the filter. We then asked that the propeller governor be removed and the gasket screen be inspected for metal. Had metal reached the prop governor gasket screen, that would mean that it got past the oil filter and that the main and rod bearings would be contaminated. We prepared the owner for the possibility that the engine might have to be torn down.
Fortunately, the prop governor gasket screen was clean, and we concluded that all the metal from the melted piston had been caught by the oil filter. We asked the shop to drain the oil, change the filter, and service the sump with clean oil. The #3 cylinder and piston were replaced with new ones from Continental. Three weeks after the incident, the owner finally flew his airplane home. We asked him to schedule a short 25-hour oil change, filter inspection, and spectrographic oil analysis just to make sure all the liberated aluminum is out of the engine.
Close call, but we dodged the teardown bullet on that one.
Ferrous Whiskers
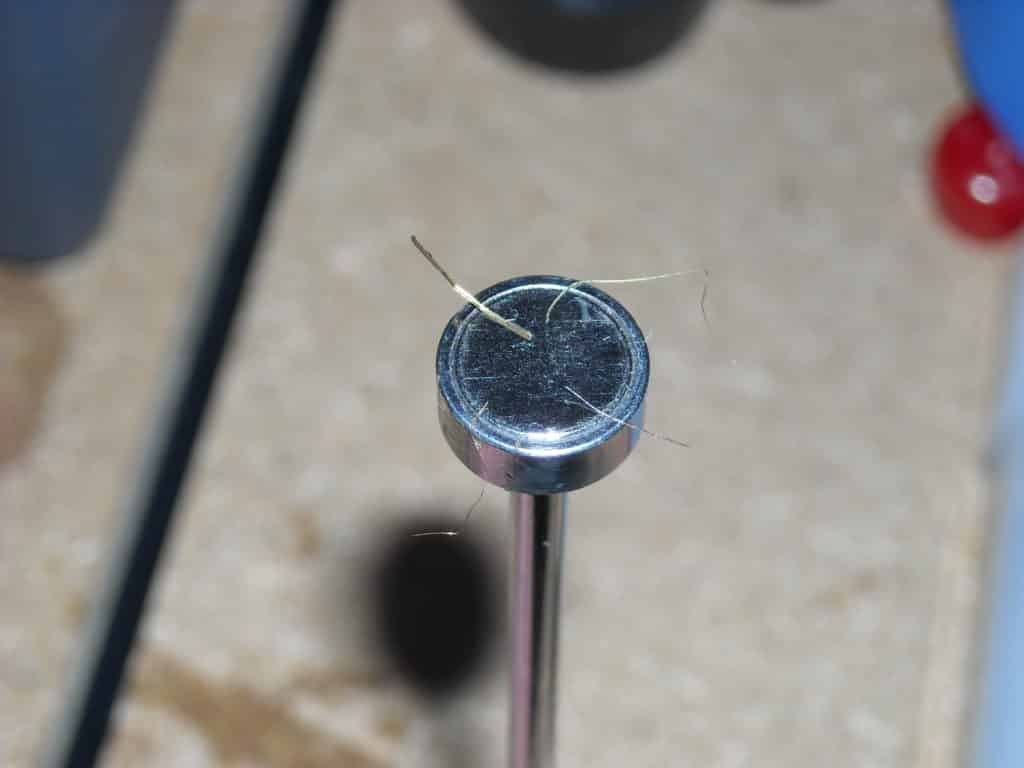
In another case with a less happy ending, I was contacted by the owner of a 1972 Bellanca Super Viking 17-30A powered by a Continental IO-520-K. (Decades ago, I owned the very same make and model.) At the last oil change, the mechanic inspected the oil screen and found a substantial quantity of ferrous metal whiskers. The Bellanca owner was looking for advice on what to do. In my experience, such ferrous whiskers almost always come from cam and lifter spalling.

I had a bad feeling about this one. The owner had not retrofitted his engine with a full-flow oil filter (something we always urge our clients to do if they don’t already have one), and the engine had only the original oil screen. I advised the owner to remove the prop governor and inspect the gasket screen, and he reported back that two ferrous whiskers were found in the gasket screen.
At that point, I sadly told the owner that I had no choice but to recommend the engine be torn down. The fact that the metal was found in the prop governor gasket screen meant that it had made it past the oil screen (which probably clogged up and went into bypass) into the main oil galleries of the engine, and almost certainly contaminated the bearings. Game over.
Had this owner retrofitted his engine with a full-flow oil filter, chances are good that all the metal would have been caught by the filter and the teardown avoided. I suspect that’s the first thing he’ll do after the engine comes back from the engine shop.
You bought a plane to fly it, not stress over maintenance.
At Savvy Aviation, we believe you shouldn’t have to navigate the complexities of aircraft maintenance alone. And you definitely shouldn’t be surprised when your shop’s invoice arrives.
Savvy Aviation isn’t a maintenance shop – we empower you with the knowledge and expert consultation you need to be in control of your own maintenance events – so your shop takes directives (not gives them). Whatever your maintenance needs, Savvy has a perfect plan for you: